
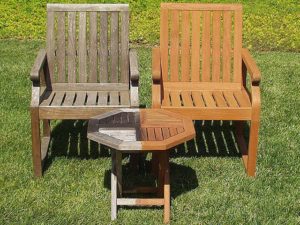
Vintage is in! From vinyl records to period fabrics…Retro and upcycling has become a mainstay in today’s world of design. And if you’re a DIY’er, there are some pretty great finds to be had at estate sales, second hand stores, sometimes places you’d never even think of for furniture buys. With just a little elbow grease and maybe a little help from your friends (psst…it’s kinda what we do…) you can have that retro-vibe style for pennies on the design dollar!
So you found your vintage wooden chair? Great! Give us a call and we can replace that worn out fabric with a variety of colored or patterned canvas replacement covers. We also offer Sunbrella (marine grade acrylic) and Phifertex mesh for heavy duty outdoor use. The most important thing to remember when replacing your cover is the *THERE IS NO STANDARD SIZE*. When it comes to these wonderful old chairs, in the last 100 years there have been so many different manufacturers with as many models of chairs. This is why an accurate measurement is absolutely necessary. Here is a link to our tutorial on how to measure and install your replacement cover:
www.everywherechair.com/how-to-purchase-and-install-directors-chair
More often than not, when these chairs are bought as second hand finds (or passed down from friends and family) the wooden frame will need refinishing as well. Not to worry! This can be accomplished by even the most novice woodworker. All you need is some basic tools and supplies that are readily available at your local hardware store. It is very helpful to have a work surface, such any of the portable workbenches found here. The process is time-consuming, depending on the size and state of your project; but it is well worth the effort when you are finally finished – the WOW factor, not to mention the bragging rights! The following is a list of supplies and tools you will need:
TOOLS MATERIALS
Scraper tool Spray-on paint stripper
Palm sander and pads Disposable shop cloths
Sandpaper or sanding block Tack cloth
Paintbrush or staining pad Mineral Spirits
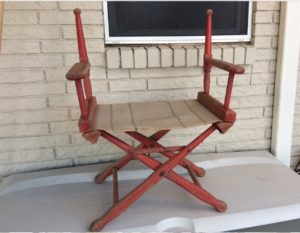
No sweat, right? Now on to the more difficult part… Get your elbows greased and ready! Wooden furniture refinishing is done in basically five steps. These steps are in order, start to finish. Skipping any part may only affect the aesthetics of your finished product, and save a little labor, but shouldn’t the juice be worth the squeeze? We think so! To illustrate a bit what we mean by “project”, here is the before picture of a customer’s table height Gold Medal Director’s Chair . It was a vintage find at a yard sale – only $5!
Let’s get started:
Step 1: Stripping
Sound exciting? Clothing is optional for the process but gloves are highly recommended! Apply the spray-on paint stripper evenly over the surface and let it sit for 5 to 10 minutes. You’ll see the old finish start to lift up off the wood. Scrape off the old finish with your tool, cleaning the edge after each swipe. You may have to apply stripper and scrape more than once in order to remove the majority of the old finish. Allow to dry once all the old finish is removed, and then wipe with mineral spirits to remove any residue. Once this is fully dry, you are ready for the next step.
Step 2: Sanding
To remove the last bits of finish, use a palm sander with medium-grit sandpaper (about 150-grit) until you see the bare wood. Then switch to fine sandpaper (200+ grit) until the entire piece is uniform. Wipe off any remaining residue and dust with a tack cloth. The hard part is now done, you’re over the hump! Ready for Step 3? This is the part I enjoy most.
Step 3: Staining
There are many options available for staining – from a variety of colors, to the consistency and amount of coats needed (depending on your product of choice). I won’t go into all the details of choosing the right stain for your chair; explain your project to your local hardware store clerk and they should easily be able to help you choose the right product.
Staining is easiest to do with a staining pad. Dip the pad in the stain and wipe it on using long, even strokes. Then use a clean wiping cloth to remove excess stain. Wipe lightly with the grain to avoid streaking. You’ll need to apply multiple coats until you like the color. Keep following the same process but be sure to let the stain dry between coats so you can gauge what it looks like before deciding whether to add another coat. This is YOUR project and so there are no rules as to how much stain is enough. You choose how you want your chair to look! Note: Painting your finish on will require a longer dry time. If you are applying and then wiping off, or spraying, dry time is less. Once you’re satisfied with the color of your frame, it’s time to wrap it up – step 4.
Step 4: Applying Clear Coat
While wood stains add color and bring out the beauty of the wood, clear finishes protect the wood and enhance its beauty. Clear finishes, or “topcoats”, will protect your project against damage from water, household chemicals, and every day wear. And the beautiful finish will make your wood come alive!
Outdoor furniture will be exposed to sunlight, temperature changes and humidity. For these conditions, you need to protect your project with a finish that has ultraviolet absorbers and special oils that expand and contract with temperature changes. Once your last coat of stain is totally dry, apply the oil-based clear coat for a final layer of sheen and protection.
Always apply thin coats. Thick coats take longer to dry and are more likely to be uneven and attract dust. This may seem like more work and longer total hours, but trust me, an ounce of prevention is worth a pound of cure – ahem, elbow grease.. The process generally requires that you apply two coats, sanding in between with 200-grit or higher sandpaper after the first coat is dry. To be certain that the finish is ready to be sanded, try a small, inconspicuous area first. If the finish starts to “ball up”, STOP. It is not dry enough to be sanded. Wait at least 30 minutes then test again.
Using a brush to apply instead of a cloth? Minwax, a maker of stains and topcoats, suggests “tipping off” each section of your project at a 45-degree angle to minimize brush marks and bubbles. Then lightly run the bristles over the entire length of the wood.
Step 5: Curing
So what do I mean by “curing”? Isn’t that drying? No, not exactly. Drying refers to the time between applying coats of product. You can tell if your topcoat is DRY by touching; if it is no longer tacky and doesn’t smell, it’s dry. CURING, more importantly, is recommended before subjecting your finished project to daily use and can take days. After clear coating, the rule of thumb is to let your finished piece fully cure in a warm, dry, well-ventilated area. You can expect to be using your piece lightly after about 2 days but be cautious – the finish may still be curing for another week. The actual time your project needs to be fully cured depends largely on the conditions of the room in which you are storing your piece. Cooler temperatures and high humidity levels can prolong drying AND curing time especially.

So how did it go? From start to finish – picking your vintage chair to personalizing it- I think you will agree that this is a fun and worthwhile project. It’s truly such a nice feeling after it all to stand back and say “By golly, I did that!” You may have started out a novice, but by the end of your first completed project, you can become practically a pro. It’s not that difficult a hobby, but one that certainly requires dedication. But it pays off in spades every time you see your chair (or project) and tell its story, of which you are now a part! You now have at least your first piece of vintage/retro décor and for much less than designer prices. Enjoy!!
For more great refinishing and woodworking information, check out TopReveal.com
Send us your before and after pictures – we love them!! We have an ugly chair contest running this summer on our Facebook, Twitter, and Instagram pages. Enter by uploading a picture of your chair (ugly or not!) and tag us: @everywherechair. You could win a $25 gift certificate to www.everywherechair.com – that’s a new replacement cover set!